TRACKER Motion Tracking Software
A critical part of the motion capture ecosystem for engineering.
Tracker 4.4 is available now!
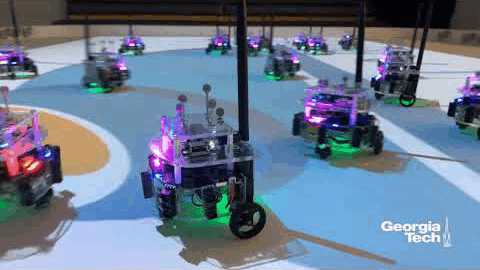
Tracker is your engineering motion capture software solution. From robot tracking to human factors engineering, from design optimization to virtual engineering, from previsualization to drone tracking, Tracker offers all this and more.
Tracker combines a simple yet highly functional user interface, with the ability to capture high-quality, real-time data.
Designed for and dedicated to the exactingly precise requirements of the engineering field, Tracker places the tools you need at your fingertips while allowing you to focus on what matters: your work.

![]()
Only with Tracker does capture continue if the markers become visible to just one camera, resulting in fewer gaps, more dependable data and more capture volume.
![]()
Real-time system modelling with SimuLink
![]()
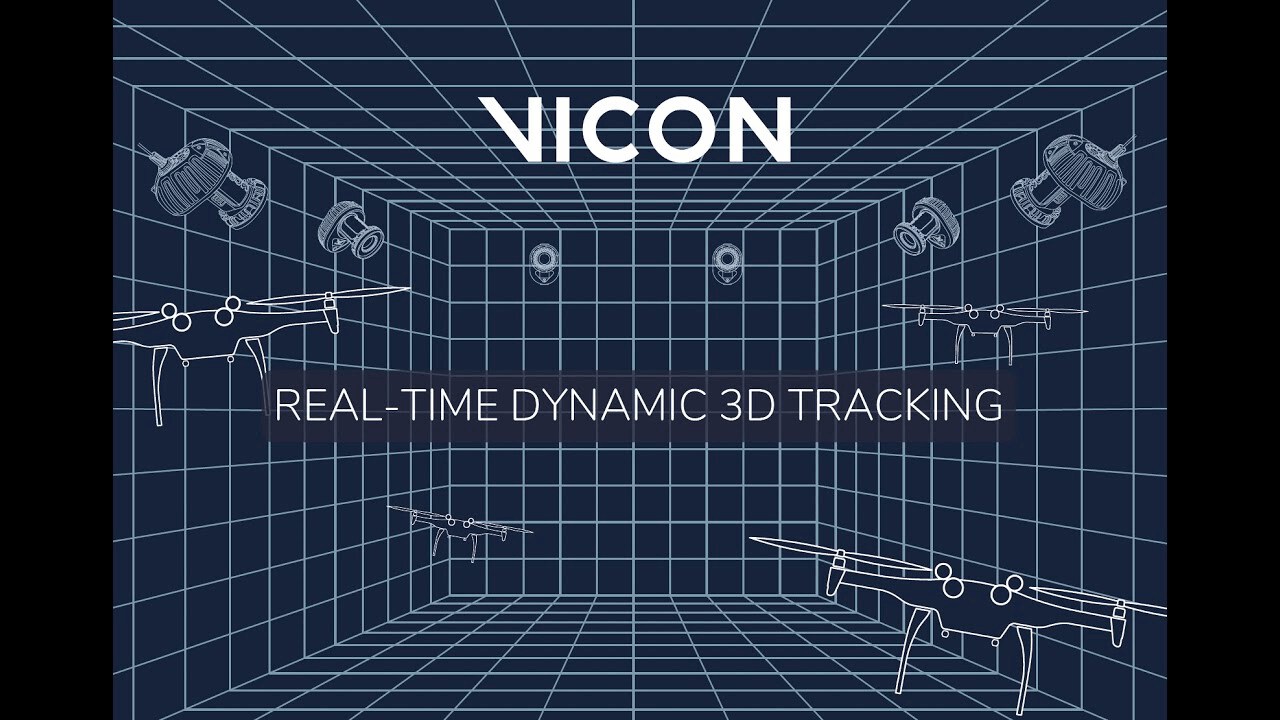
Vicon excels at offering accurate, real-time object position and orientation with extremely low latency.
![]()
Synchronize data from third party devices.
![]()
Optimize your workflow with remote command and control functionality through the Tracker API.
![]()
Streams with Robot Operating System (ROS / ROS2), Python, Matlab, C++, .Net, Unity, Unreal, Siemens Process Simulate & Autodesk plugins.

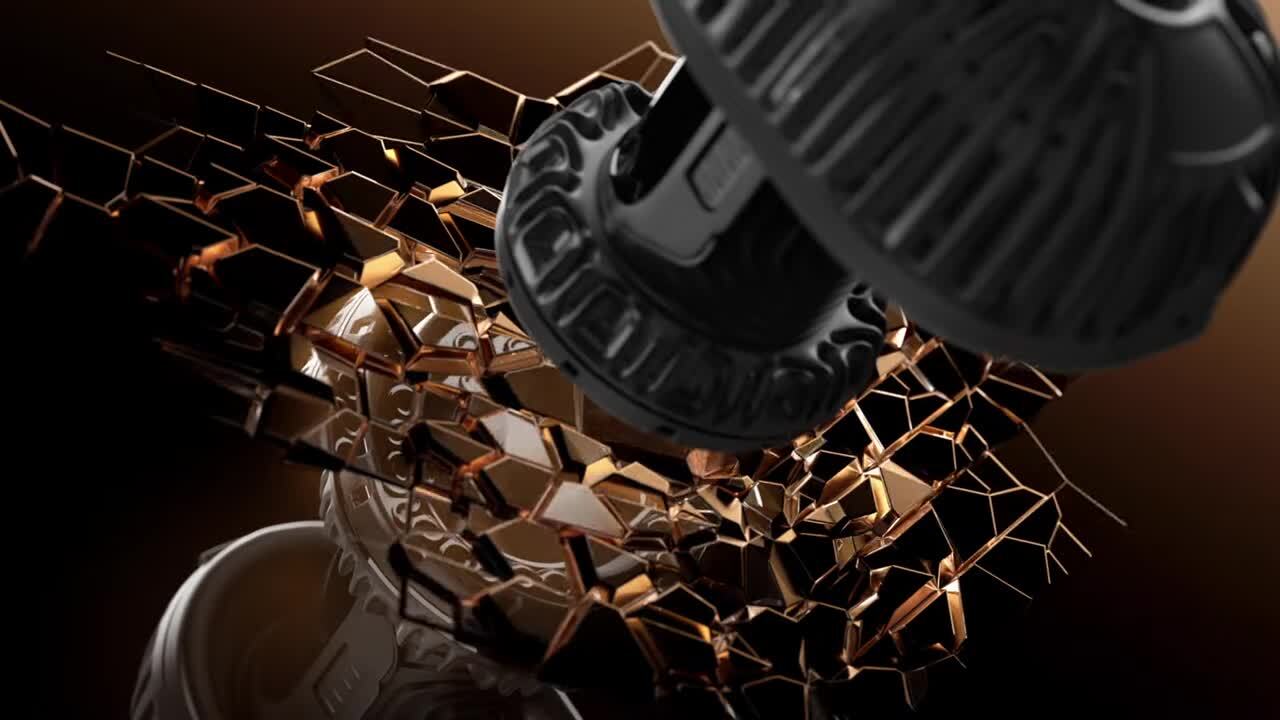
Tracker 4 improves on its predecessor with the integration of Valkyrie, the world’s most powerful motion capture camera.
The combination of Tracker 4 and Valkyrie empowers users to
Vicon is the premier solution for UAV and Robotic studies because we understand what is important: a highly accurate system, providing low-latency data that is easy to use. With our turnkey approach and easy-to-access DataStream, users can easily integrate accurate Vicon data into virtually any control system.
Precise tracking is key for providing ground truth for robot localization experiments. A Vicon system provides the highest order of positional and angular precision by optimally selecting and fusing all available data.
![]()

Boeing, Airbus, Ford, BMW, UPENN and NASA are some of those using Vicon systems at the forefront of ground-breaking applications in ergonomics, engineering and research. Vicon systems have been used for everything from simulating maintenance procedures in military aircraft to modeling the behaviour of self-driving cars in traffic systems.
However you want to expand the possibilities of your field, your Vicon system will give you the precision and fidelity that you need.
Vicon motion tracking software provides powerful tools for capturing, processing, and analysing movement data with precision. Designed for engineering and research workflows, it delivers reliable results, streamlined data handling, and seamless integration with motion capture systems. Trusted by engineers and researchers worldwide, it enables accurate tracking, visualisation, and reporting across complex projects.
Vicon delivers unmatched dynamic accuracy to 0.017mm (mean) – that’s 1.5 the width of a human hair – and 3 times better
than that of the nearest competitor.
The ability to track in warehouse-scale and outdoor installations, which is particularly applicable for unmanned ground /
aerial vehicles (UGV / UAV).
Track high numbers of objects simultaneously at high speeds.
Capture larger volumes with active marker tracking, allowing users to cover warehouse-scale volumes with proper scaling.
System healing maintains calibration ensuring robust tracking. Operating seamlessly behind the scenes delivering a smooth and uninterupted operation completeley within your existing pipeline.
| Current release version | Windows 11 | Windows 10 | Windows 7 | Linux | OSX |
| Shōgun 1.20 | 64 bit | 64 bit | x | x | x |
| Nexus 2.16 | 64 bit | 64 bit | x | x | x |
| Evoke 1.7.0 | 64 bit | 64 bit | x | x | x |
| Tracker 4.1.0 | 64 bit | 64 bit | x | x | x |
| Polygon 4.4.6 | 64 bit | 64 bit | x | x | x |
| Capture.U Desktop 1.3.1 | 64 bit | 64 bit | x | x | 10.12 |
| CaraLive 1.3.0 | 64 bit | 64 bit | 64 bit * | x | x |
| CaraPost 1.2.0 | 64 bit | 64 bit | 64 bit* | x | x |
| Pegasus 1.2.2 | 64 bit | 64 bit | 64 bit* | x | x |
| ProCalc 1.6.1 | 64 bit | 64 bit | x | x | x |
| ProEclipse 1.5.0 | 64 bit | 64 bit | x | x | x |
| DataStream SDK 1.12.0 | 64 bit | 64 bit | x | 64 bit | 10.11 |
| Bodybuilder 3.6.4 | 64 bit | 64 bit | x | x | x |
| Nexus Insight 1.0.0 | 64 bit | 64 bit | x | x | x |
Please do note:
1. Open the Network and Sharing Center and navigate to Change Adapter Settings. Vicon Vantage/Vero cameras are designated to one port. For each Vue (or Bonita Video) camera connected, there will be additional network port used.
2. Right click on the proper port and go into the Properties. The Local Area Connection Properties window will open. Make sure only Internet Protocol Version 4 (TCP/IPv4) is selected.
3. Select Internet Protocol Version 4 (TCP/IPv4) from the list and select Properties to assign the proper IP address.
a .Vantage/Vero cameras will have the following IP Address: 192.168.10.1 and Subnet Mask of: 255.255.255.0
b. The first VUE camera will have the following IP Address: 192.168.10.2 and Subnet Mask of 255.255.255.0
c. Any additional VUE cameras the last IP value is incrementally increased by one. For example, the second VUE camera will be 192.168.10.3.
Select OK to close out of the Internet Protocol Version 4 (TCP/IPv4) Properties. And OK again to close out of the Local Area Connection Properties. This will make sure all changes have been saved.
4. Feel free to rename the network port so it is easily identifiable. Such as ViconMX, VUE1 or VUE2
For further assistance please refer to the Configuring Ports section of the PCSetupforViconSystems.pdf found in Downloads > Documentation
Tracker documentation
Visit the Tracker documentation pages, for information including:
Tracker 4.4
Filename: Tracker 4.4.0+163908hx64
Tracker enables engineers to focus their energy on the things that matter most – their applications. With system health reports and various means of accessing data (including live), not only can you have confidence in the quality of your data but you will never have to worry about missing a significant data point. From robotics to virtual prototyping, human factors engineering to virtual reality, Tracker always has the best in-class performance, delivering data with the highest accuracy and lowest latency.
Tracker 4.4 is a point release which provides the following updates:
– Support for new Vicon Active Wand
For full documentation on Tracker 4, click here.
Tracker 4.3
Filename: Tracker_4.3.0+162840h_x64
Tracker enables engineers to focus their energy on the things that matter most – their applications. With system health reports and various means of accessing data (including live), not only can you have confidence in the quality of your data but you will never have to worry about missing a significant data point. From robotics to virtual prototyping, human factors engineering to virtual reality, Tracker always has the best in-class performance, delivering data with the highest accuracy and lowest latency.
Tracker 4.3 is a point release which provides the following updates:
– Support for VK6 cameras
– General performance and bug improvements
For full documentation on Tracker 4, click here.
Tracker 4.2
Filename: Tracker_4.2.0+160146h_x64
Tracker enables engineers to focus their energy on the things that matter most – their applications. With system health reports and various means of accessing data (including live), not only can you have confidence in the quality of your data but you will never have to worry about missing a significant data point. From robotics to virtual prototyping, human factors engineering to virtual reality, Tracker always has the best in-class performance, delivering data with the highest accuracy and lowest latency.
Tracker 4.2 is a point release which provides the following updates:
– Native Simplified Chinese translation allows you to operate Tracker 4 in Simplified Chinese
– Scene meshes allows you to create visual twins and environments within your workspace
– Graph plot improvements
– General performance and bug improvements.
For full documentation on Tracker 4, click here.
Tracker 4.1
Filename: Tracker_4.1.0.151165h_x64
Tracker enables engineers to focus their energy on the things that matter most – their applications. With system health reports and various means of accessing data (including live), not only can you have confidence in the quality of your data but you will never have to worry about missing a significant data point. From robotics to virtual prototyping, human factors engineering to virtual reality, Tracker always has the best in-class performance, delivering data with the highest accuracy and lowest latency.
Tracker 4.0 is a patch release which provides more flexibility for high-speed captures with the additional support of VK8 cameras. System upgrades further optimize the flow of data and processing efficiency providing users, particularly of large systems, a significant performance upgrade.
For full documentation on Tracker 4, click here.
Requirements
Licensing: Tracker 4.x license
Supported Operating System: Windows 10 (64-bit) and Windows 11
Tracker 4.0
Filename: Tracker_4.0.0.146813h
Tracker enables engineers to focus their energy on the things that matter most – their applications. With system health reports and various means of accessing data (including live), not only can you have confidence in the quality of your data but you will never have to worry about missing a significant data point. From robotics to virtual prototyping, human factors engineering to virtual reality, Tracker always has the best in-class performance, delivering data with the highest accuracy and lowest latency.
Tracker 4.0 is a major release which enables you to track more objects, at faster speeds and in large volumes with larger camera counts. It features a new flexible UI providing more control over your workflow and new processes which aim to keep tracking and data quality robust, even as the environment changes.
Major features include:
– System health reports
– System healing
– Live review
– Preview mode
For full documentation on Tracker 4, click here.
For those upgrading from Tracker 3, see the Tracker 4 migration guide here.
Tracker 3.10.0
Filename: Tracker_3.10.0.145497h
From robot tracking to human factors engineering, design method optimization to virtual engineering and previsualization, Tracker will enable you to do all of this and more. Tracker has the best in-class performance featuring the lowest latency and highest accuracy.
Tracker 3.10 is a new update which provides support for Vicon Valkyrie cameras (VK16 and VK26), Tobii Pro Glasses 3 and an improved Video Preview mode.
Requirements:
Windows 10 x64
Valid Tracker 3.x license
Tracker 3.9.0
Vicon Tracker: from robot tracking to human factors engineering, design method optimization to virtual engineering and previsualization, Tracker will enable you to do all of this and more.
Tracker 3.9 is a new update for Vicon Tracker, which provides support for Vantage+ High Speed mode.
For details on What’s New in Tracker 3.9 and addressed issues: click here
For full documentation for the latest version: click here
Tracker 3.8.0
Vicon Tracker: from robot tracking to human factors engineering, design method optimization to virtual engineering and previsualization, Tracker will enable you to do all of this and more.
Tracker 3.8 is new update for Vicon Tracker, with
For full documentation for the latest version: click here
Requirements
* Windows 10 x64
* valid Tracker 3.x license
Tracker 3.7.0
Important note: If using an existing Tracker 3.x network license, the license server needs to be updated to the latest version (SentinelRMSLicenseManager9.1.0).
Abstract
File Name: Tracker_3.7.0.111190h_x64.zip
Vicon Tracker: from robot tracking to human factors engineering, design method optimization to virtual engineering and previsualization to virtual reality, Tracker will enable you to do all of this and more.
Tracker 3.7 is a point release for Vicon Tracker, which includes improvements to the calibration volume reproducibility and firmware notifications. If the Vicon system is not using the latest firmware, Tracker will notify firmware update is available.
Addresses issues:
Requirements
Windows 10 x64
Licensing: Tracker 3.x Safenet license
Link aggregation is used to describe various methods for using multiple parallel network connections to increase throughput beyond the limit that one link (one connection) can achieve. Link aggregation is supported in Tracker 1.3+, Nexus 1.8.5+, Blade 2+.
When setting up Link Aggregation ensure that you have the correct Network cards (Intel i340-T4 or the Intel i350-T4 cards) installed on your capture PC. Once you have the correct Network card(s) follow these steps:
1. Make sure your three network ports have fixed IP addresses 192.168.10.1, 192.168.10.2 and 192.168.10.3. A maximum of nine NICs are allowed (192.168.10.1 – 192.168.10.9 inclusive).
2. Connect the 192.168.10.1 and 192.168.10.2 ports to one Giganet/Power over Ethernet switch (POE) and 192.168.10.3 to the other Giganet/POE. You will need an extra cable connecting your Giganets/POEs.
3. Run Tracker/Nexus/Blade, set your workspace to Camera and select all the cameras in the System pane (you will need to expand Vicon Cameras). Please do note that there might be slight differences between the three applications.
4. Turn the Giganet/POE connected to 192.168.10.3 off then select all the cameras that just went red in the System pane.
Select the Destination IP Address drop-down and select 192.168.10.3.
5. Select the remaining (green) cameras then scroll down their Properties, select the Destination IP Address drop-down and select 192.168.10.2.
6. Turn the Giganet/POE connected to 192.168.10.3 back on. Select all the cameras in the System pane.
Save your System configuration.
You can find the latest documentation for all current versions of software here:
Vicon Core Software will also install documentation/help guide when you install the software.
Once installed, launch the software and select Help > View Installed Help
The following software will install Help:
Nexus 2, Shōgun, Tracker 3, Blade 3, Pegasus, CaraLive, CaraPost, Polygon 4
The Virtual-Reality Peripheral Network (VRPN) is a library that provides an interface between 3D immersive applications and tracking systems used for Virtools. Vicon Tracker 3 has a built-in VRPN server that will stream data natively into these applications or will allow for the development of simple interfaces using VRPN.
Virtools, a commercial application, has support for VRPN and can be configured to connect with Vicon Tracker as follows.
A full VRDevice.cfg file is included below.
Note
Head@TrackerPC is the way Virtools connects to the VRPN server within Tracker. The format is object_name@PC_Name. This configuration file will look for an object called “Head” on the Tracker server called “TrackerPC.”
=======================================
vrpnTracker_0 Head@TrackerPC
neutralPosition_0 0.0 0.0 0.0
neutralQuaternion_0 0.0 0.0 0.0 1.0
axisPermute_0 0 2 1
axisSign_0 1 1 1
trackerScale_0 1
TrackerGroup_0 T0:0:6
=================
This VRDevice.cfg also contains other directives that:
axisPermute_0 0 2 1
axisSign_0 1 1 1
TrackerGroup_0 T0:0:6
To complete the process, do the following:
trackerScale_0
in your VRDevice.cfg file to 0.001 (converts Vicon mm to Virtools m).
For a full description of any of these configuration options, please refer to the Virtools documentation.
If the cameras continue to connect with the previous version of software but don’t in the latest version then the software is probably being blocked by the Windows Defender Firewall. Although Vicon officially specifies that the Firewall should be turned off completely to ensure unobstructed communication with the cameras and connectivity devices, sometimes institutional protocols mandate it to be turned on. If this is the case:
If this does not resolve the issue then please contact Vicon Support.
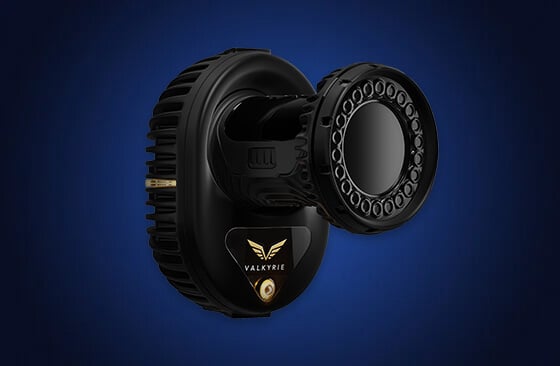
Valkyrie is the most powerful motion capture camera ever brought to market, offered with four different specs with four different focuses: resolution, speed, value, and strobeless.
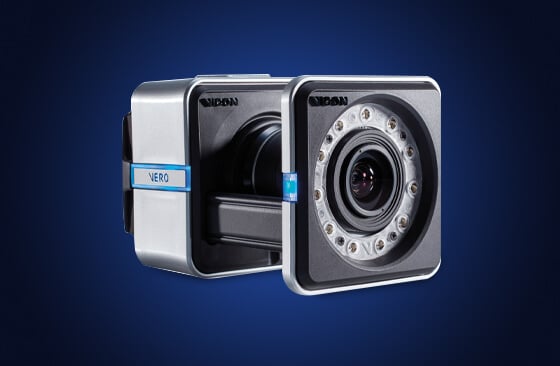
With the best resolution/speed/price offering on the market, Vicon Vero is the latest optical camera from Vicon. Building on the success of Vantage, Vero combined market-leading resolution and speed at an unrivaled price point. Like its bigger brother, Vantage, Vero has on-board sensors that monitor camera position and temperature to ensure optimal performance at all times.
Vicon are here to support you on your Motion Capture journey. We’re happy to provide more information, answer questions and help you find the solution you need. Get in touch with our experts today.